

SK-LED Button keypad – brief user guide
Brief user guide for the Trikdis SK-LED Button push-button keypad, for the FLEXi SP3 alarm control panel: the keypad indications, arming and disarming, Night and Stay mode, user codes, zone bypass, emergency alarms, light and volume levels.
- 6 min read
- Manufacturer: Trikdis

1. Keypad overview
The indicators and keys of the keypad are marked with numbers in the picture:
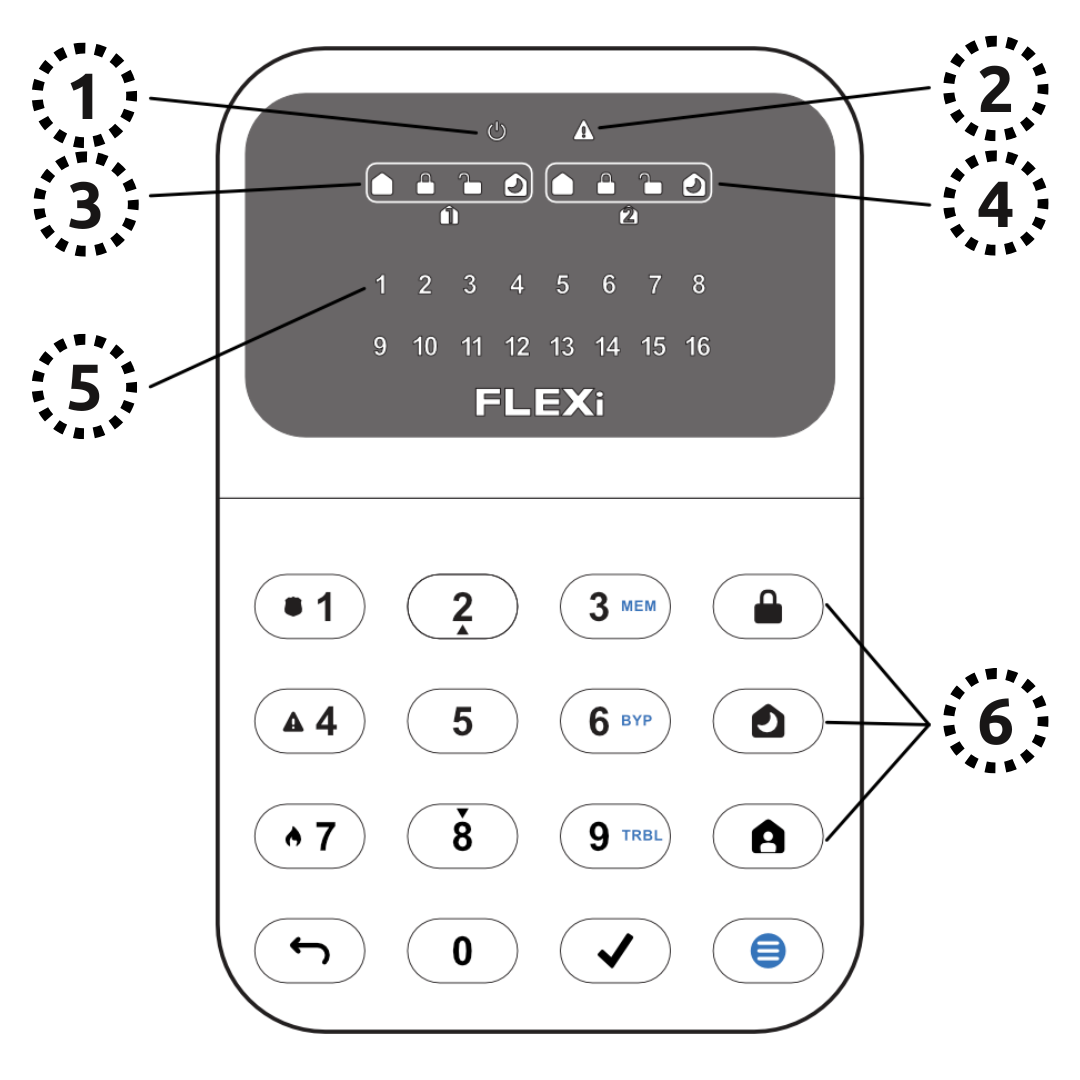
- Power indication
- System status indication
- Area 1 (partition 1) status indication
- Area 2 (partition 2) status indication
- The [1]–[16] number indicators belong to zones 1–16.
- On – the zone is violated
- Off – the zone is being monitored
- Flashing – zone or user selected
- Flashing quickly – there was a zone alarm
- Partition control keys
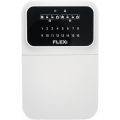 Trikdis SK-LED Button keypad
2. Arming / disarming the alarm system
2.1 Alarm system (away) ARMING
- Make sure that no zone is active or violated.
(For example: check that all doors and windows are closed and the motion detectors do not detect any movement. The system can only be armed when every detector is in its “idle” state.) - Press the [
 ] key.
- Enter the user code.
- Select the area.
- Press the [
 ] key.
- Leave the area within the exit delay time.
After the code has been entered, the LED flashes.
When the system is armed, the LED is on.
2.2 Alarm system DISARMING
- Enter the user code.
- Select the area.
- Press the [] key.
When the system is disarmed, the  LED is on.
2.3 NIGHT / SLEEP mode
The building shell (perimeter) is protected, movement inside is free. Opening a door or window triggers the alarm.
- Press the [
 ] key.
- Enter the user code.
- Select the area.
- Press the [] key.
- NIGHT arming switches on immediately.
The LED is on when NIGHT arming is active.
2.4 STAY mode (staying at home)
There is a delay on entry. Movement inside is free.
- Press the [
 ] key.
- Enter the user code.
- Select the area.
- Press the [] key.
- STAY arming switches on immediately.
The  LED is on when STAY arming is active.
To change the state of an area, it is enough to enter the user code and select the desired area. To clear the commands you have entered, press the [ ] key.
3. Creating, changing and deleting codes
3.1 Adding a new code / changing an existing one
This is how you add a new user code or change an existing one:
- Press [
 ], then the [0] key
- Enter the master code (default: 1234)
- Enter the two-digit number of the user (e.g. 02)
- Enter the new code twice
- Select the areas assigned to the user
- Press the [] key.
To exit, press the [] key again.
Note
- The number of the master code: [01]
- The codes consist of 4 digits.
3.2 Deleting a user code
This is how you delete a user code:
- Press [], then the [0] key
- Enter the master code
- Enter the two-digit number of the user (e.g. 02)
- Press the [] key. (After a beep, the indicator of the key that marked the user whose code was deleted from memory goes off.)
- Press the [] key.
To exit, press the [] key again.
4. Zone bypass (BYPASS)
A bypassed (BYPASS) zone does not trigger an alarm, and the system can be armed without it.
4.1 Activating the bypass
This is how you bypass one or more zones:
- Press [], then the [6] key
- Enter the user code (the
 LED starts flashing green)
- Enter the two-digit number of the zones. You can enter several one after the other, e.g. 05 then 11.
- Press the [] key (the LED is steady green if there is a bypassed zone)
4.2 Cancelling the bypass
Repeat the steps used to switch it on.
5. Emergency alarms, resetting fire detectors
5.1 Sending an emergency alarm
- Police – press the [1] key for 3 seconds
- Medical help – press the [4] key for 3 seconds
- Fire brigade – press the [7] key for 3 seconds
Note: works only with an active monitoring subscription
5.2 Resetting fire (smoke) detectors
After a fire or smoke alarm, the detectors must be reset from the keypad:
- Press the [] key for 3 seconds
Note: fire and / or smoke detectors do not reset automatically after an alarm. They must be reset manually.
6. Light and volume settings
The brightness of the keypad and the volume of the keys can be set from the menu, as described below.
6.1 Key brightness
This is how you set the strength of the key backlight:
- Press [], then the [1] key
- Set the brightness with the [2] / [8] keys
- To save [], to exit []
6.2 LED brightness
This is how you set the strength of the indicator lights (LEDs):
- Press [], then the [4] key
- Set the brightness with the [2] / [8] keys
- To save [], to exit []
6.3 Key volume
This is how you set the loudness of the beep heard when a key is pressed:
- Press [], then the [7] key
- Set the volume with the [2] / [8] keys
- To save [], to exit []
6.4 Switching off the standby light
This setting controls whether the keypad backlight stays on when the device switches to standby mode (that is, when no key has been pressed for a while).
- Press the [] key.
- Pressing the [5] key toggles whether or not the backlight stays on in standby mode.
- To save [], to exit [].
The SK-LED Button keypad handles 16 zones and 2 areas (partitions). Areas can be assigned to individual keypads; in that case the keypad shows only the state of the assigned areas. This function is available from keypad firmware FW:1.0 and alarm control panel firmware FW:SP3_xxx4_0120.
7. Safety instructions
Attention!
Electricity can be dangerous and may cause personal injury or DEATH, as well as other financial loss or damage if not used or installed properly.
Installation involves working with electrical equipment, and it should be executed in accordance with current regulations!
Warranty validation requires the device to be installed by a qualified person following the installation regulations for electrical equipment and adhering to the current regulations for the safe operation of electrical equipment.
- The keypad may only be installed and maintained by qualified persons.
- Changes, modifications or repairs not authorized by the manufacturer void the warranty.
- Follow local waste disposal regulations: do not throw the device in household waste – hand in the discarded device as electronic waste.
See also
- FLEXi SP3 user manual – operating the system, the Protegus 2 app and trouble indications.
- FLEXi SP3 alarm control panel manual – wiring and setting up the keypads (for installers).
Tags:
Related Articles

Trikdis FLEXi SP3 – Smart Alarm Control Panel Introduction
- 10.08.2020
The Trikdis FLEXi SP3: smart alarm control panel with integrated communicator – versatile, fast and cost-effective.
Read More
Firmware Update Process for the FLEXi LCD Keypad
- 06.03.2023
Step-by-step guide to updating the firmware of the Trikdis FLEXi LCD keypad.
Read More
SK-LCD Button keypad – brief user guide
- 02.11.2026
Brief user guide for the Trikdis SK-LCD Button push-button keypad with display, for the FLEXi SP3 alarm control panel: the display and the keys, arming and disarming, Sleep and Stay mode, user codes, zone bypass, emergency alarms, light and sound levels, the symbols on the display.
Read More