
One application for all Trikdis devices






Trikdis E16 Ethernet Communicator - IP module
- Manufacturer: Trikdis
- Item code: E16
- Availability: In Stock
- Warranty: 2 years
- Categories: Alarm Communicator > Ethernet Communicator

-
€82.90 Ex Tax: €67.40
Connect E16 to Honeywell Vista + Protegus (Tutorial)
This video shows how to connect the TRIKDIS Ethernet communicator E16 to a Honeywell Vista 48 control panel and configure it with Protegus.
The Trikdis E16 Ethernet communicator works with Paradox, DSC and other manufacturers' alarm control panels, communicating directly via the data bus (DATA BUS) or serial port (SERIAL PORT).
Data is transmitted to the monitoring station and the user via the Protegus 2 mobile and web application over wired internet. Using the communicator, the alarm system can be remotely armed or disarmed from the owner's mobile app or browser, and connected devices can be controlled and monitored.


Trikdis communicators are excellent replacements for Paradox and DSC IP modules and SIM card communicators (e.g. Paradox IP150, IP150+, IP180, PCS250, PCS265LTE; DSC ENVISALINK4, TL / LE series).
What does Trikdis offer?
- Reliable operation
- Free Android, iPhone and web application
- Event monitoring
- Remote control (arming / disarming)
- Direct connection to the alarm control panel — for many compatible models
- IP and GSM/LTE communication in one device — dual path, multi-channel
Alarm control panels connectable via data bus or serial port
Die Trikdis E16, G16, GT, GT+, GET are compatible with all the alarm control panels listed below . The main advantage of these specialized Trikdis communicators is that events are transmitted via the data bus or serial port.
Magellan MG5000, MG5050, MG5050+*
DIGIPLEX EVO48, NE96, EVO96, EVO192*, EVOHD* (*Fw. above 7.50)
For direct control, the firmware of PARADOX panels must be at least version V.4.
* Die serial port on the new marked alarm panels is locked at the factory. The port must be enabled before communication with an external device is possible.


Premier Elite 12, 24, 48, 64, 88, 168

Magellan MG5050E
ESPRIT E55, 728ULT, 738ULT



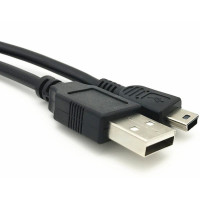
You'll Need a Cable for Connection
Connection to Data Bus or Serial Port, What Does This Mean?
In this case, the communicator is practically taught to understand the alarm panel's own language (one-way communication). Just like operators or other peripheral devices, the communicator sees events and will transmit the appropriate information according to the settings.
Direct Control
In the case of directly controllable panels, the communicator not only receives notifications from the panel but also a part of the functions available on the keypad becomes accessible (bidirectional communication).
- Activation / deactivation of the entire system or partition using a user code
- Detection of zone statuses
- Zone bypass
- Automatic mapping of partitions and zones

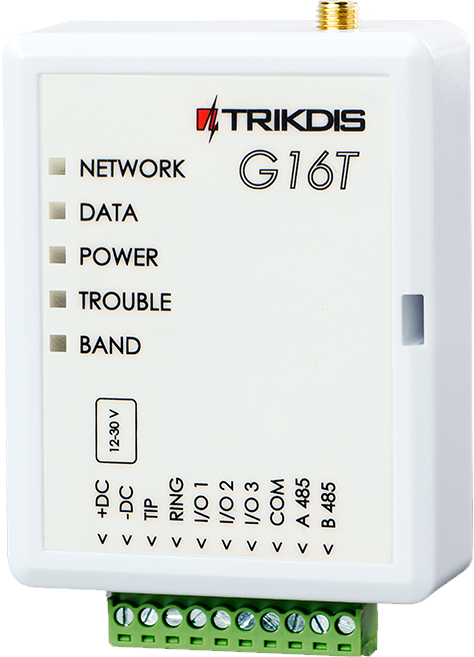


Main features:
- IP communicator working over Ethernet, compatible with popular alarm control panels from major manufacturers
- Uniquely connects not via TIP RING but via data bus or serial port — message reading and transmission takes less than a second
- Free Protegus 2 server — no fixed IP or dynamic DNS required
User features:
- The owner is notified of system events via the free Protegus 2 mobile and web application
- Push notifications and alarm sound for events and alerts
- Remote arming and disarming
Controllable outputs:
- 3 flexibly configurable contacts as input or output
- RS485 port for additional compatible expansion modules and devices
- Outputs controllable from the Protegus 2 application
- Remote control of connected devices (lighting, gate, ventilation, heating, irrigation, etc.)
Quick installation
- Settings can be saved to a file as a starting point for another device's configuration
- Quick and easy configuration via USB or remotely after first setup using TrikdisConfig or Protegus 2
- 2 access levels: Administrator, Installer
Monitoring station connection:
- The module transmits messages in Contact ID format to the monitoring station via IP
- Compatible with universal SIA DC-09 and SUR-GUARD TL150 receivers
- Automatically switches to backup channel if primary channel connection is lost
- Signalling to up to two monitoring stations, each with a backup channel
Communication
To Protegus cloud, to iOS/Android Protegus mobile apps
WiFi, LAN (with optional E485 module)
SMS or voice call
VHF / UHF radio signaling (with optional T16 communicator)
Compatible devices
iO Expansion Module
iO-MOD - iO-WL radio transceiver expansion modules
Contacts (inputs and outputs)
Programming
Users
Technical data
- E16 Hungarian installation guide (2.45MB)
- TrikdisConfig programming software (windows)
- E16, E16T GRADE 4 certification (282.4KB)
Related Products

Related Articles

Protegus Android / Iphone and web app
- 27/01/2018
The free Protegus mobile and web app lets you remotely manage your alarm system – compatible with any manufacturer.
Read More
Alarm Control Panel Direct Control via Data Bus or Serial Port
- 19/10/2018
Trikdis direct control via data bus or serial port: advantages, compatibility and available functions.
Read More
Installer Registration and Company Logo Setup in the Protegus App
- 06/03/2019
Step-by-step guide to Protegus installer registration and company logo setup – completed in 5–10 minutes.
Read More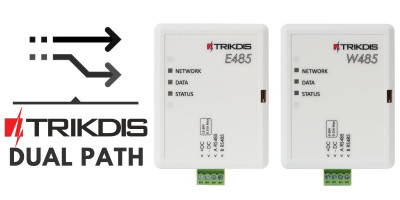
Dual Path – Redundant Channel Solutions from Trikdis
- 01/12/2019
Trikdis W485/E485 modules: redundant communication channel alongside GSM communicators, with lower data costs.
Read More
New to Trikdis? A Quick Introduction to the Products
- 28/08/2019
Quick overview of the Trikdis product family: communicators, alarm control panels, gate controllers and Protegus 2.
Read More
New Supported Protocol for Trikdis Communicators – Sur-Gard TL-150
- 08/02/2020
Trikdis communicators now support Sur-Gard TL-150 protocol – no IPcom virtual receiver required.
Read More
How to Add an IP Camera to Protegus 2
- 01/03/2022
How to add an IP camera live stream to the Protegus 2 app via RTSP link.
Read MoreProtegus 2 Business Account Pricing
- 01/02/2025
Protegus 2 Business Account subscription pricing for installers – monthly and annual fees by number of systems.
Read More
Protegus 2 Browser Interface Renewed
- 30/11/2023
The renewed Protegus 2 browser interface and the new layout explained.
Read More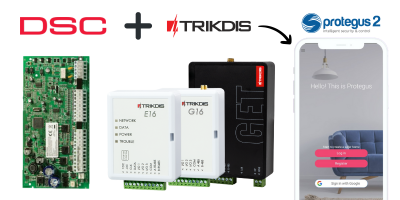
TRIKDIS Communicator + DSC Alarm Control Panel – Brief Installation Guide
- 19/01/2024
Brief installation guide for connecting a DSC alarm control panel with a TRIKDIS communicator and setting up the Protegus 2 application.
Read More
Try Protegus 2 on a Live System
- 20/02/2024
Try the Protegus 2 app on a real live system with test credentials.
Read More
TRIKDIS Communicator + PARADOX Alarm Control Panel – Brief Installation Guide
- 26/02/2024
Brief installation guide for connecting a PARADOX alarm control panel with a TRIKDIS communicator and setting up the Protegus 2 application.
Read More
DSC Power Series NEO and Trikdis Communicators: Compatibility and Solutions
- 01/03/2025
Are DSC Power Series NEO systems compatible with Trikdis special communicators? Solutions and alternatives.
Read More
Comparison Table of TRIKDIS Communicators for Alarm Systems
- 01/04/2025
Overview of TRIKDIS alarm communicators by connection type and communication method. Find the right model for your alarm system.
Read MoreTags
Frequently asked questions
The Starlink router may block the E16's communication, and since it is not manageable, this cannot be resolved on it. Turn on Bypass Mode in the Starlink app and connect the E16 to your own router (for example TP-Link) that is connected to Starlink.
The symptom: the E16 is connected to Starlink internet through the Starlink router, yet it cannot reach the monitoring station. The TROUBLE LED blinks 6 times, which according to the manufacturer's manual means there is no connection with the monitoring station's receiver.
Why: the Starlink router may block the communicator's traffic. The Starlink router is not manageable, so this cannot be resolved on it. The solution is to take the Starlink router out of the path and let your own router manage the network.
The solution:
- In the Starlink app settings, turn on Bypass Mode (Settings → Bypass Mode). It roughly corresponds to the bridge mode familiar from modems: the Starlink router switches off, its WiFi is disabled too, and from then on your own router manages the network.
- Connect the WAN port of your own router (for example TP-Link) to Starlink, with the WAN set to DHCP. How to connect differs by Starlink kit (some need the Starlink Ethernet Adapter); Starlink support describes it kit by kit.
- Connect the E16 to one of the LAN ports of your own router. If the E16 has a fixed IP address, adjust it to your router's address range (gateway, DNS); with DHCP it gets an address automatically.
Note: according to Starlink, Bypass Mode can only be turned off by a factory reset of the Starlink router.
If the connection still fails behind your own router, also see the questions about switch loop protection and closed corporate networks.